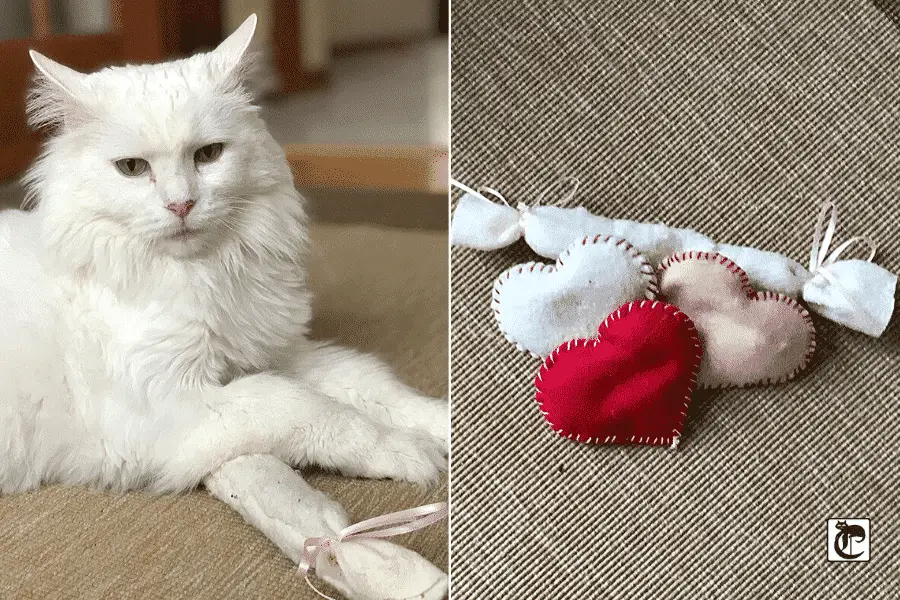
If you’re like me, your cats are definitely part of any Valentine’s Day festivities. I try to feed them their favorite food, maybe give a few extra treats and definitely more play time. I’m always gushing over my kitties and I felt like doing something extra special for them… so I set out to make some cute Valentine’s Day cat toys. You don’t have to be a master seamstress or a insanely creative person… just use your heart and they’ll turn out great! Here’s what you’ll need!
Materials Needed
Heart shaped stencil. I printed out a stencil from Photoshop. You can use mine here.
Pen, pencil or marker to trace the stencil on the felt.
Felt squares in pink, red and white. I also used some leftover organic batting for the cream-colored toys. You can also find 100% sheeps wool and more natural blends which are preferable.
Embroidery floss in pink, red and white. If you don’t want all of these colors, you can go to Michaels or Hobby Lobby and get whichever colors you want. I bought mine at Michaels for less than $1 each.
Embroidery needles – you can get a variety pack on Amazon for $5 or less.
Organic catnip. Of course I recommend our own Apothecaty organic catnip. Check out our 5-star reviews! Choose a strong variety like silver vine. Another great option is the fine ground as it’s a great filling for toys.
Satin Ribbon – 1/8″ thin red or pink ribbon for bows on the “candy” toy.
Instructions for Heart Cat Toys
- Print out the stencil on regular paper.
- Cut out the heart shape following the outer outline.
- Take a piece of felt and fold it in half. You’ll need two hearts to sew together.
- Lightly trace the heart stencil on the felt.
- Cut out the two hearts. I cut the two hearts out at the same time and they came out even.
- Using a contrasting color for your embroidery floss/thread. Then use a whip stitch to run along the edge of the fabric. Start near the “V” of the heart for best results.
- Stitch along the perimeter until you have about a one-inch gap.
- Fill with catnip – the more the better. Use a small funnel if it helps to fill the toy.
- Finish stitching the remaining inch and close the hole.
- Be sure to knot the thread and try to hide the knot and end inside the two layers.
- That’s it! You’re done!
Instructions for long “candy kicker” cat toy
- Cut out a rectangular piece of felt (12″ long by 4-5″ wide should work). No need to be precise here.
- Fold the felt in half.
- Sew together the long edges, but leave about an inch unsewn on each side.
- Turn the fabric inside out so that you are left with a tube (stitching on the inside).
- Tie one end of the tube with the satin ribbon (use about 8-12″ – you can always cut longer ribbon) about an inch or so in from the end where you stopped sewing the tube.
- Secure your bow by putting in a few stitches through the bow’s knot. This way it won’t come untied.
- Fill the tube with catnip – the more the better!
- Tie the other end of the tube with another piece of the satin ribbon. Tie it the same way, about an inch or so in from the opposite end.
- Secure your bow by putting a few stitches through the bow’s knot.
- That’s it! You’re done!
Be Meow Valentine
Wow! That was so much fun and so easy! It’s a ton of fun seeing my kitties enjoying their new toys – pouncing on them, kicking them and tossing them in the air! As with any toy, be sure to keep an eye out for kitty destruction. If the toy becomes damaged, throw it away. Any materials that have lost their original integrity should be thrown away so that your cat doesn’t accidentally ingest any of the materials.
What are your thoughts? Would you consider making homemade toys for your cat?
This blog contains affiliate links. For more information about third-party advertising on this site, please click here.
